
February 18, 2022
Bike Maintenance Tips: Cleaning the Winter Off Your Bike, Part One
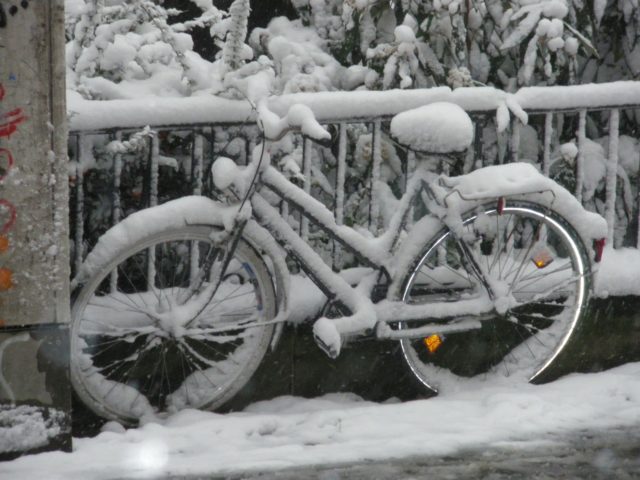
We have a little more than a month of winter left, and winter—with snow, slush, salt, sand, and the decaying residue of last fall’s leaves, can be hard on a bike’s appearance.
So you’ve been commuting throughout winter, including some of our snowstorms (🤩SUPERSTAR🤩), but now your nice shiny bike looks terrible. What’s the best way to clean it?
We’re going to split this bike maintenance tip into two parts:
1. Cleaning the bike frame and wheels
2. Cleaning and lubing the drivetrain, which you’ll have to do a couple of weeks from now (part two of this bike maintenance tip will come at a later date!)
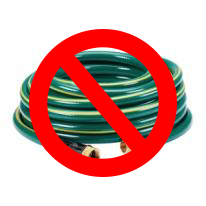
Before we begin, don’t use a hose to clean off your bike. It’s not recommended, and really not necessary. If you have a steel frame, the large volume of water from a hose can get inside small “air escape” holes made when the frame was being welded. Then, that water sits in there and can corrode the frame. Also, spray can get inside moving parts like freewheels, and inside hubs and bottom bracket bearings.
TL;DR, no hose.
Lastly, during the winter we recommend cleaning your bike indoors (so when you spray soapy water onto your bike it doesn’t freeze, and you don’t freeze either).

Items you will need:
- A dollar store shower curtain, so salty black grungy stuff doesn’t run off your bike onto your nice rug, carpet, or flooring.
- A variety of dollar store soft bristle cleaning brushes (a bottle brush is especially handy). Or, you can splurge and get the Park Tool Bike Cleaning Brush set.
- Two or three clean cotton rags (old t-shirts, dead cotton, or wool socks are good, too).
- A household vacuum or shop-vac (sorry, your Roomba will not work for this!).
- A spray bottle of very soapy water (use A LOT of grease-cutting dish soap. I also use Murphy’s Oil Soap) or a good biodegradable household cleaner like Simple Green. There are pricier products like Muc-Off, but for average urban winter grime, a spray bottle of extra soapy water works fine.
- A second bottle of just plain rinse water is handy, but not absolutely necessary.
- Any kind of car wax or bike polish, such as Pedro’s Bike Lust.
- A beer (or cup of tea, whatever floats your boat😊).
STEP 1
(Optional) Remove accessories like fenders, racks, bottle cages, a frame pump, lock from the bike, and clean those separately with your spray cleaner and a rag.
This adds extra time, but it makes it easier to clean the rest of the bike, especially hard-to-reach corners.
Step 2
(Suggested) Use your household vacuum with the brush attachment to remove chunky loose stuff like dead leaf residue, sand, and grit.
No vacuum? No problem.
Use a soft bristle brush to knock that stuff off. Do this all over the frame and the rims. Really, you don’t want your cleaning rag getting all the big gritty stuff, and rubbing that all over the frame (it’s abrasive!) so make sure your vacuum or soft bristle brush gets as much of it as possible.
Step 3
Clean the frame, fork, hubs, and rims. I usually work section by section, starting from the top and working down. The frame top tube is usually the cleanest, so start there. I do the fork, downtube, seat tube, rear triangle, rims, and hubs separately, rather than spraying the entire bike down all at once. Use brushes to get hard-to-reach areas (like behind the crankset), hubs, and rims. Use a rag to wipe off the soapy grimy water.
Already your bike looks way better without the alternating black and salty streaks. Turns out your rims are actually silver, and not black!
It’s also a good idea to run your rag or brushes over the spokes, crankarms, and brakes to remove grime from those areas.
Step 4
(Optional) Rinse the bike with a spray bottle of plain water and wipe down/dry off with a fresh, clean rag (not the rag you were already using in the first step).
Step 5
Using another rag, polish your bike with your preferred car wax or bike polish.
Remove your wheels for this; you don’t want spray polish to get on the braking surface of the rims. Cover your brake pads or disk brakes with baggies or a rag as well, so you don’t spray wax on the brake pads. Wax + braking surfaces = terrible braking.
You can also polish some of those accessories you removed. Polishes help protect your bike’s finish, but it also helps shed street crud when you have to ride in rainy or snowy conditions.
Step 6
Crack open a beer, pour yourself a cup of coffee, or just sit back and relax when you’re done and celebrate your now-shiny bike. (Pro tip: you can also enjoy a cold one or two while cleaning your bike😉).
Make sure to check back here in a few weeks for part two of our winter bike cleaning tip!
Cheers to clean bikes! 🍻
Written by Bike New York’s Director of Education, Rich Conroy.